-
Instructors: Adding in-course labs to your course
Read articleIn-course labs provide learners with hands-on experiences, allowing them to apply course concepts directly, build confidence, and gain job readiness. This article provides an overview of the in-course labs feature and how to add it to your course.
If you’re participating in Udemy’s Instructor GenAI Program, learners will also have the option to use the Udemy AI Assistant feature, AI task review, to generate feedback on their task solution. See more information on the AI task review feature for learners.
- Visit our Teaching Center for frequently asked questions about in-course labs.
Table of contents
- What are in-course labs?
- How to access in-course labs
- How to create an in-course lab
- Editing or deleting an in-course lab
- Questions?
What are in-course labs?
In-course labs are a curriculum item that allows learners to practice technical skills in real environments called workspaces. In-course labs enable learners to practice skills in real workspaces without leaving your course. By engaging actively with your content, learners can improve retention and learning outcomes.
For more examples and best practices, review our Teaching Center article.
How to access in-course labs
1. Navigate to the Curriculum page of your course.
2. Within a section, click +Curriculum item and then select Lecture With Lab.
3. Click on +Content and add a video to your course.
Note: In-course labs can be added to any lecture in a draft course and any unpublished lectures in an already published course.
4. After your video processing is complete, click on the +Lab button to open the Lab Editor.
How to create an in-course lab
After accessing the Lab editor, follow the instructions below.
- Review our Teaching Center article for examples and best practices on creating your in-course lab title.
1. Begin planning your lab by selecting your lab workspace from one of the available options. Some of the workspaces available include:
- AWS - Udemy AWS In Curriculum Template
- Azure
- Azure Open AI
- Datascience - Jupyterlab 4
- Data Science - PhpMyAdmin/SQL
- Datascience & Web - Python-3.13_cli
- DevOps - Linux (shell scripting)
- Web - Java21_cli
Note:
- While Udemy workspaces are available for Personal Plan and Udemy Business Pro subscribers, other learners may need to use their own personal environments.
2. If you wish, download and customize starter code for the lab. Next, select the applicable file and upload it to the lab (optional). This is what learners will see once they launch the workspace associated with the lab.
3. Add tasks to break your lab into manageable steps. Add a task title and timestamp, or the exact second in your lab video when each task begins.
- You can also attach any task resources, including datasets, images, mockups, or configuration files.
Note: For eligible labs, the task title and description will be used to inform the Udemy AI Assistant’s response for AI task reviews. We recommend adding a description to help inform the AI task review.
4. Enter the estimated duration of the lab. After finalizing your lab, you can use the Preview function or click Publish.
Editing or deleting an in-course lab
To edit an in-course lab, return to the Curriculum page and click on the lab title. Make any changes, then save or publish as needed.
To delete an in-course lab, select the trash can icon next to the lab.
Note: Deleted in-course labs can't be restored.
Questions?
Visit our Teaching Center for the following resources:
- Review frequently asked questions about in-course labs
- See best practices and examples while creating your in-course lab.
-
Instructors: How to Troubleshoot Video Uploading Issues
Read articleThis article outlines troubleshooting steps instructors can take if they’re encountering issues uploading videos to their courses.
For example, if it’s taking an extremely long time to upload a video to your course, or you’re encountering an error message while attempting to do so.
Review troubleshooting steps for the video processing stage: the processing stage occurs after videos have been uploaded to your course.
How to troubleshoot video uploading issues
Check your internet connection: most uploading issues are caused by a poor internet connection. If you experience issues while the video is being uploaded it could be due to the following:
-
A slow internet connection speed. Try uploading the videos when your internet connection is faster. Or, try uploading the video from a different internet connection.
-
The data limit for your internet provider has been reached. Try uploading the video from a different internet connection.
-
You are connected to the internet through a VPN and your connection provider has blocked uploads. Try uploading the video from a different internet connection.
Ensure the video file name doesn’t contain special characters or symbols: make sure that the file name for the video does not contain any special characters or symbols. Remove any spaces or underscores from the file name. Once you’ve edited the video’s file name, try uploading the video again.
Make sure the video meets the requirements: in order for the video to upload the video must have a resolution of at least 720p and the file must be less than 4.0 GB in size.
You’re encountering error messages: if you are receiving one of the following messages, there may be an issue with the Udemy platform.
-
“System couldn’t initiate their upload”
-
“Signature is not correct”
-
“Problem initiating upload request”
-
"Invalid according to Policy: Policy expired"
These issues can often be resolved by deleting the lecture and uploading the file again from a different browser like Google Chrome. You can also try uploading your file using the Bulk File Uploader.
If you are still having trouble, please contact our support team and include the following information:
-
The lecture file
-
The operating system you're using
-
Your internet connection speed
-
-
Instructors: Troubleshooting Video Processing Issues
Read articleThis article includes troubleshooting steps instructors can follow after they have uploaded a video to their course, but have encountered delays or issues in the processing stage.
Learn more about troubleshooting steps for video uploading issues.
The troubleshooting steps below should help resolve the video processing issue, so you can resume building or editing your course.
Troubleshooting video processing problems
After the video has been uploaded to your course, and the upload bar has filled completely, the file will begin processing and it should finish processing on its own.
The video file is taking hours to finish processing: if the file is still processing after 5 hours, however, please delete the lecture and start again.
You encounter an error message: if an error message informs you there’s an issue with the file that’s preventing it from processing correctly, then please perform the recommended action. Here are some of the troubleshooting steps you may need to take:
- Make sure that the video file name does not contain any special characters or symbols. Try removing spaces and underscores.
- Change the video format. The preferred format is .MP4 codec H.264 (with an AAC or MP3 audio codec).
- Reduce the size of the video file. Uploads should not be larger than 4 GB.
- Reduce the resolution of the file. Videos up to 1080p are preferred.
We also recommend checking that you can open and view your file on your computer and it is the correct file.
Still need help?
If you’re still having trouble, please contact our Support Team and we'll be happy to help. Please include the following information, as it will help our team investigate and resolve the issue for you.
- The video file
- The operating system you're using
- Your internet connection speed
- A screenshot of the error message
- The troubleshooting steps you've tried
-
How to Use the Bulk Uploader
Read articleThis article outlines how to use the Bulk Uploader tool to upload multiple files to your course. The bulk uploader also lets you access files from external services and lists all the files that have been uploaded, including when and whether the upload was successful.
Table of Contents
- Access the bulk uploader
- Upload files from your computer
- Add files from external services
- Unlink external services from the bulk uploader
- Access your files
- Delete a file from your library
Access the bulk uploader
1. Access the Curriculum page.
2. Click Bulk Uploader at the top of the page.
Upload files from your computer
Click browse files to select the files to upload from your computer. You can also add files by dragging them onto the screen.
To add more files, click +Add More in the top right.
Once you have selected the file(s) you would like to add to the course, click Upload file(s) on the bottom left. If the upload is successful, a Complete notification will appear.
Note: It may take a moment or two before the Upload file option appears after you drag the files onto the page.
Add files from external services
You can also access files you may have stored with external services. Select the service from the Bulk Uploader, and follow the instructions to establish a connection to the file's host.
Unlink external services from the bulk uploader
If you wish to unlink an external service after using the Bulk Uploader, we recommend logging into the service and revoking access from there.
Access your files
Click Add from library to access your files when adding video content or lecture resources.
- Learn how to add video content.
- Learn how to add resources to lectures.
Note: Mashup lectures and closed captioning files utilize the browser uploader, and as a result, can't be accessed to build this type of lecture.
Files will be listed under Filename, followed by the Type of file, Status of the uploaded file, and the uploaded Date.
- Learn how to manage your library.
Delete a file from your library
To permanently delete a file from your library, click on the trash can icon.
- Note: This action cannot be undone.
-
How to Manage Your Library
Read articleFiles and resources that have been added to your account via the Bulk Uploader, can quickly be accessed and managed in your library. You can move these files to a specific lecture or store them in your library for future use.
Adding Files to Your Library
You can add files to your library by using the Bulk Uploader, which is located on the right hand side of the Curriculum page.
For more information on how to use the Bulk Uploader, please refer to this article.
Sorting Your Files
You can sort through your files by, Filename, Type and Date Uploaded by clicking on the arrow that appears to the right of each category.
Checking the File Status
You can also see whether a file has been successfully added to your library by checking the Status column.
If the file has been uploaded to the library, and is ready to use, you will see Success posted in this column. You will see Processing if the file is still being prepared for use, and Failed, if the file was not successfully uploaded.
For additional information on uploading issues please click here. For troubleshooting steps regarding video processing issues, please review this article.Deleting a File
To delete a file from your library, click on the trash can icon on the right hand side.
Please note that deleting a file from your library cannot be undone.Moving Files From Your Library to Your Course
To add videos and other resources to your lectures from your library, head to the Curriculum page of the course you would like to edit. Next, you can access your library and add content to your course, by clicking on Add From Library as you create or edit your lectures.
Please note that once you add the file to your course, it will no longer be stored in your library. As a result, if you wish to use the same file in another lecture, then it will need to be uploaded again.
For more information on creating a new lecture, please click here. To learn how to edit or update the content of an existing lecture, click here. -
Creating and Submitting a Test Video
Read articleThis article explains how to submit a test video, a free service to review the quality of your audio, video, and delivery.
Talk about anything you want for 1-3 minutes and receive personalized tips from a video expert on our team. You can send test videos as often as needed.
- Learn about test videos in our Teaching Center article.
Udemy video requirements
Learn about Udemy’s minimum video standards.
How to submit a test video
1. After accessing your Instructor account, click the Test Video page.
2. Follow the instructions on the page to include more information about your video.
3. On the “Lights, camera, action” page, upload your test video by clicking on Select File button.

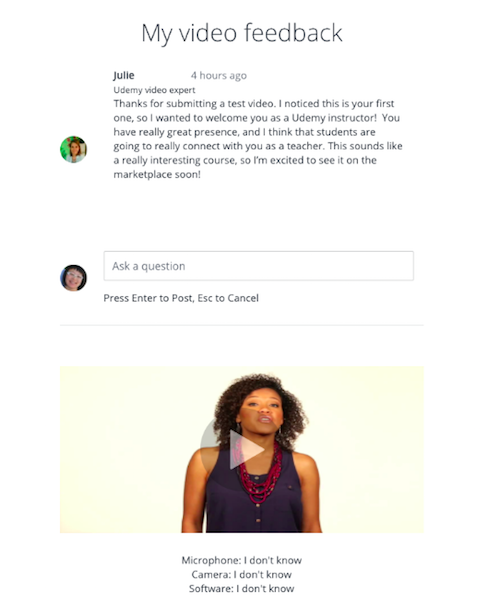
Receiving feedback
After you upload your test video, you can see its status on the My test videos page. You will also receive an email within two business days letting you know when feedback is complete.
Click on Feedback ready to receive your feedback.

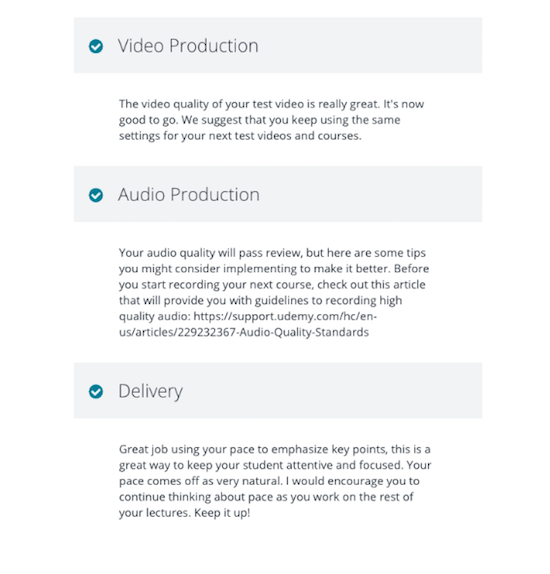
You can respond or ask a question by entering it into the section that appears below. Please allow some time for a video expert on our team to review your sample and provide you with personalized feedback on the quality of your audio, video, and delivery.
After reviewing, you can create a new test video or delete an existing one you’ve uploaded.
-
Supported File Types
Read articleThe Udemy platform supports several different types of files for lectures, and many types of files for additional resources, if you wish to include more content that students can download.
Supported Files for Lectures
Udemy courses can include article, video and mashup lectures, and these can be created using several different types of files.
- Article lectures can be created using the platform’s built in, text editor, and .JPG, .PNG .BMP and .GIF files can be inserted into the article using the add image option. Please note that the image files must be smaller than 1 MB.
- Video lectures can be built by uploading .AVI, .MGP, .MPEG, .FLV, .M2V, .M4V, .MP4, .WMV, .OGV, .WEBM and .MOV files. We recommend using MP4 files if possible, however, as we have found the uploading process works best with these.
- Mashup lectures combine videos and slides to create a compelling lecture. The video files must be in a .MP4 or .MOV format. The slides, on the other hand, must be in .PDF format. So, if you’re using software like Powerpoint or Keynote to create the slides, you will need to export them as PDFs.
Supported Files for Additional Resources
Adding additional resources can be a great way to enhance the lecture, and provide students with a more comprehensive learning experience. Please note: these resources must be available for free, related to the lecture topic, and not promotional in any manner.
The additional resources section features nearly any kind of file type, including .JPG, .PDF, .ZIP, .XLS, .MOV, .MP3, .PPT, and .DOC, among others.
Source code like .HTML, .JS, etc., however, cannot be uploaded directly, but these files can be uploaded in a .ZIP file.Source Code for Development Courses
Only Python and Ruby files can be uploaded at this time.
Uploading the Files
Files can be uploaded to the lecture by using the browser uploader, or by adding them from your library using the bulk file uploader.
Please note: .MP3 files for additional resources must be uploaded using the browser uploader. -
Troubleshooting Closed Caption Upload Errors
Read articleThis article outlines the error notifications instructors might encounter while attempting to add closed captions to your course lectures, and how can you resolve the issue.
For steps on how to add closed captions to your course videos, please click here.
Incorrectly Formatted Timing Information
If your caption entry includes timing information the system cannot read, then you will see an error notification reporting one or more of the entries has incorrectly formatted timing info.
In order for your .vtt closed caption entry to be accepted, it must be formatted with one of the timing formations below:
00:00:00 (HH:MM:SS)
00:00 (MM:SS)
00 (SS)
00:00:00.000 (HH:MM:SS.mmm)
00:00.000 (MM:SS.mmm)
00.000 (SS.mmm)
Please note: ‘m’ stands for microseconds
In addition, caption entries must have a start time that is earlier than the end time that’s been entered, in order for it to upload successfully. Accordingly, the caption entries also require a start time that is later than the previous entry’s start time.
If you receive an error sign indicating this is not the case, then you will need to edit the entry’s times.
Missing Timing Information
If the .vtt file has a correct header, but doesn’t have any timing information, or it can’t be recognised due to incorrect formatting, you will see an error sign reporting that one or more of the caption entries has text but no times.
The correct formatting for the timing information looks like “00:03:00.000 --> 00:05:00.00”. Please note that the separating arrow must have one or two space or tab characters on each side.
Missing WEBVTT Header
If the caption entry is missing the WEBVTT header, which is required for valid vtt files, you will see an error warning indicating this. Please add WEBVTT to the first line of the file in order to resolve the issue, as shown below:
Missing Track Text
If one of the caption entries has timing information but no text, you will be notified via an error sign. Each caption entry should have a start time, end time and some text in the following format:
No Caption Entries
Each caption entry should have a start time, end time and some text, and each caption entry must be separated from another with at least two line breaks. If the entry doesn’t, an error sign will appear indicating that there are no recognisable caption entries in the file.
Caption entries should be created with the following format:
-
Upload a Course Image
Read articleThis article explains how to upload a course image to your course. Course images provide learners with a snapshot of your course content and are a great way to grab their attention.
- Learn more about quality guidelines for course images.
Add an image to a course
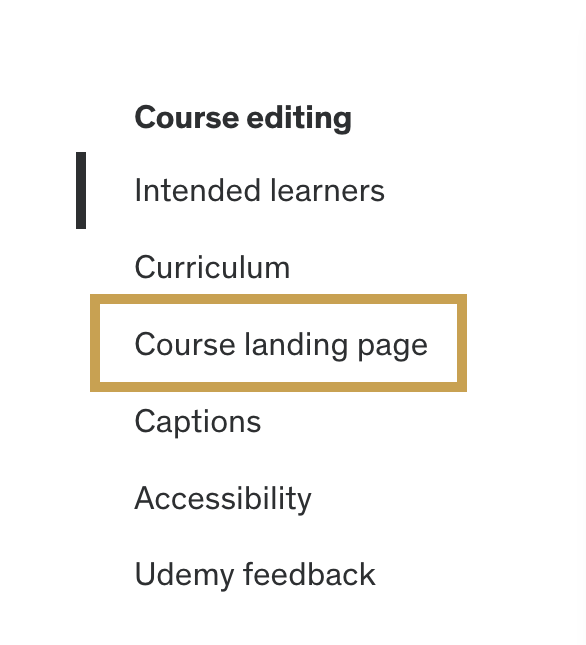
1. Navigate to the Course management page (Learn how).
2. On the left-hand side, click Course Landing Page.
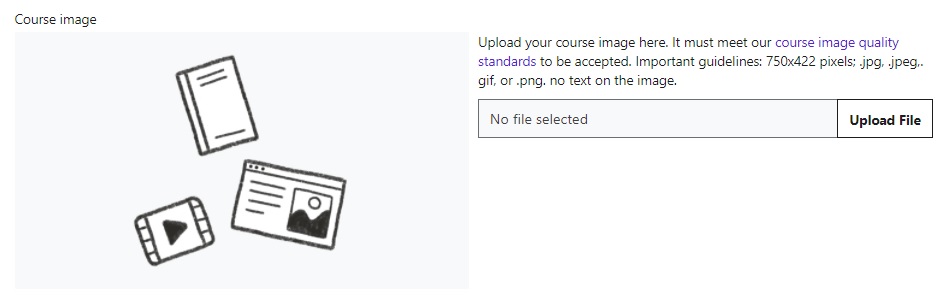
3. On the Course landing page, scroll down to Course Image. Then, click Upload File to upload an image.
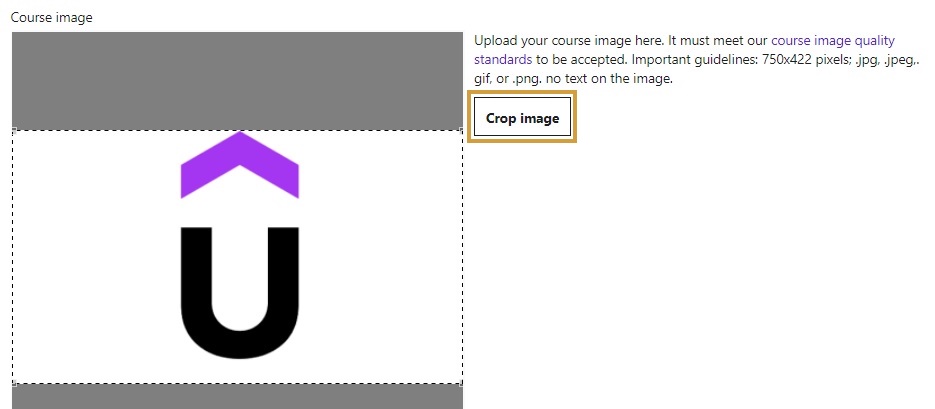
4. When it's finished uploading, adjust the crop image box as necessary and click Crop image.
5. Click Save at the top of the page.
-
Upload a Promo Video
Read articleThis article explains how to upload a promo video (promotional video) to your course and make a good first impression on learners. View our Teaching Center resource on creating a promo video.
How to upload a promo video
1. Navigate to the Course management page (Learn how).
2. On the left-hand side, select Course Landing Page.
3. Scroll down to the Promotional video section and click Upload File.
4. Click Save at the top right of the page once the upload is complete.
Your video will be processed to ensure it works smoothly on Udemy, and you will receive an email as soon as it is ready.
Uploading content
-
Instructors: Adding in-course labs to your course
Read article -
Instructors: How to Troubleshoot Video Uploading Issues
Read article -
Instructors: Troubleshooting Video Processing Issues
Read article -
How to Use the Bulk Uploader
Read article -
How to Manage Your Library
Read article -
Creating and Submitting a Test Video
Read article -
Supported File Types
Read article -
Troubleshooting Closed Caption Upload Errors
Read article -
Upload a Course Image
Read article -
Upload a Promo Video
Read article